
a traditional and familiar art form here in turkey; no one is quite certain of exactly when and where the art of ebru first developed. ebru art has been mentioned in texts found in turkmenistan and samarkand dating back to 13th century and in those from the iranian area of herat from the 14th century. the oldest remaining actual example of the art though, is from 1447 and is currently housed in the topkapi palace museum.
during the ottoman era, papers decorated with ebru art were often used for official purposes such as government documents, property deeds, or personal checks. the intricate patterns made each paper noticeable and recognizable. it is likely that this was a type of precursor to the complicated designs that are still used in modern day currencies as part of anti-fraud measures.
traditional ebru work is done by first preparing an oil-based liquid in a large rectangular dish. drops of ink are then dripped into the gooey liquid providing the color for the artwork. the artist then uses various utensils that range from a needlelike tool to thick and thin brushes the spread the paint and create different shapes and patterns. finally, a paper is laid on top of the solution and gently removed with the designs now transferred onto the paper.
the whole process is actually quite complicated; the base liquid takes two or three days to prepare, the paints are quite finicky, and creating proper designs takes patience and practice.
over the past couple of weeks, we have been rediscovering our arts and crafts closet here at home and we were thrilled to find a fully stocked ebru kit that alegra received as a birthday gift last june! we immediately pulled it out and got to work- and we had so much fun!
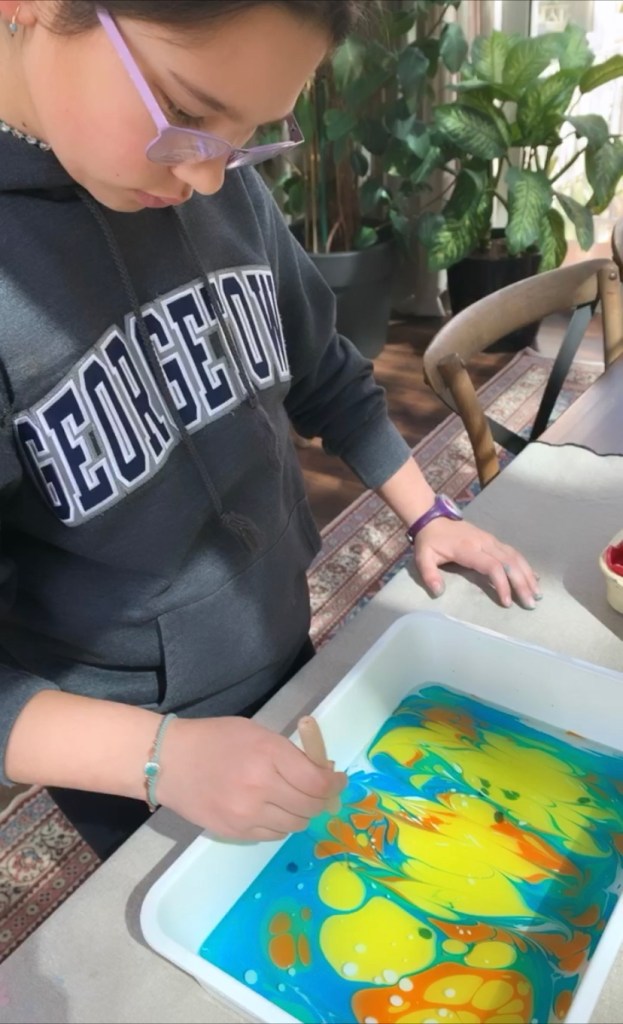
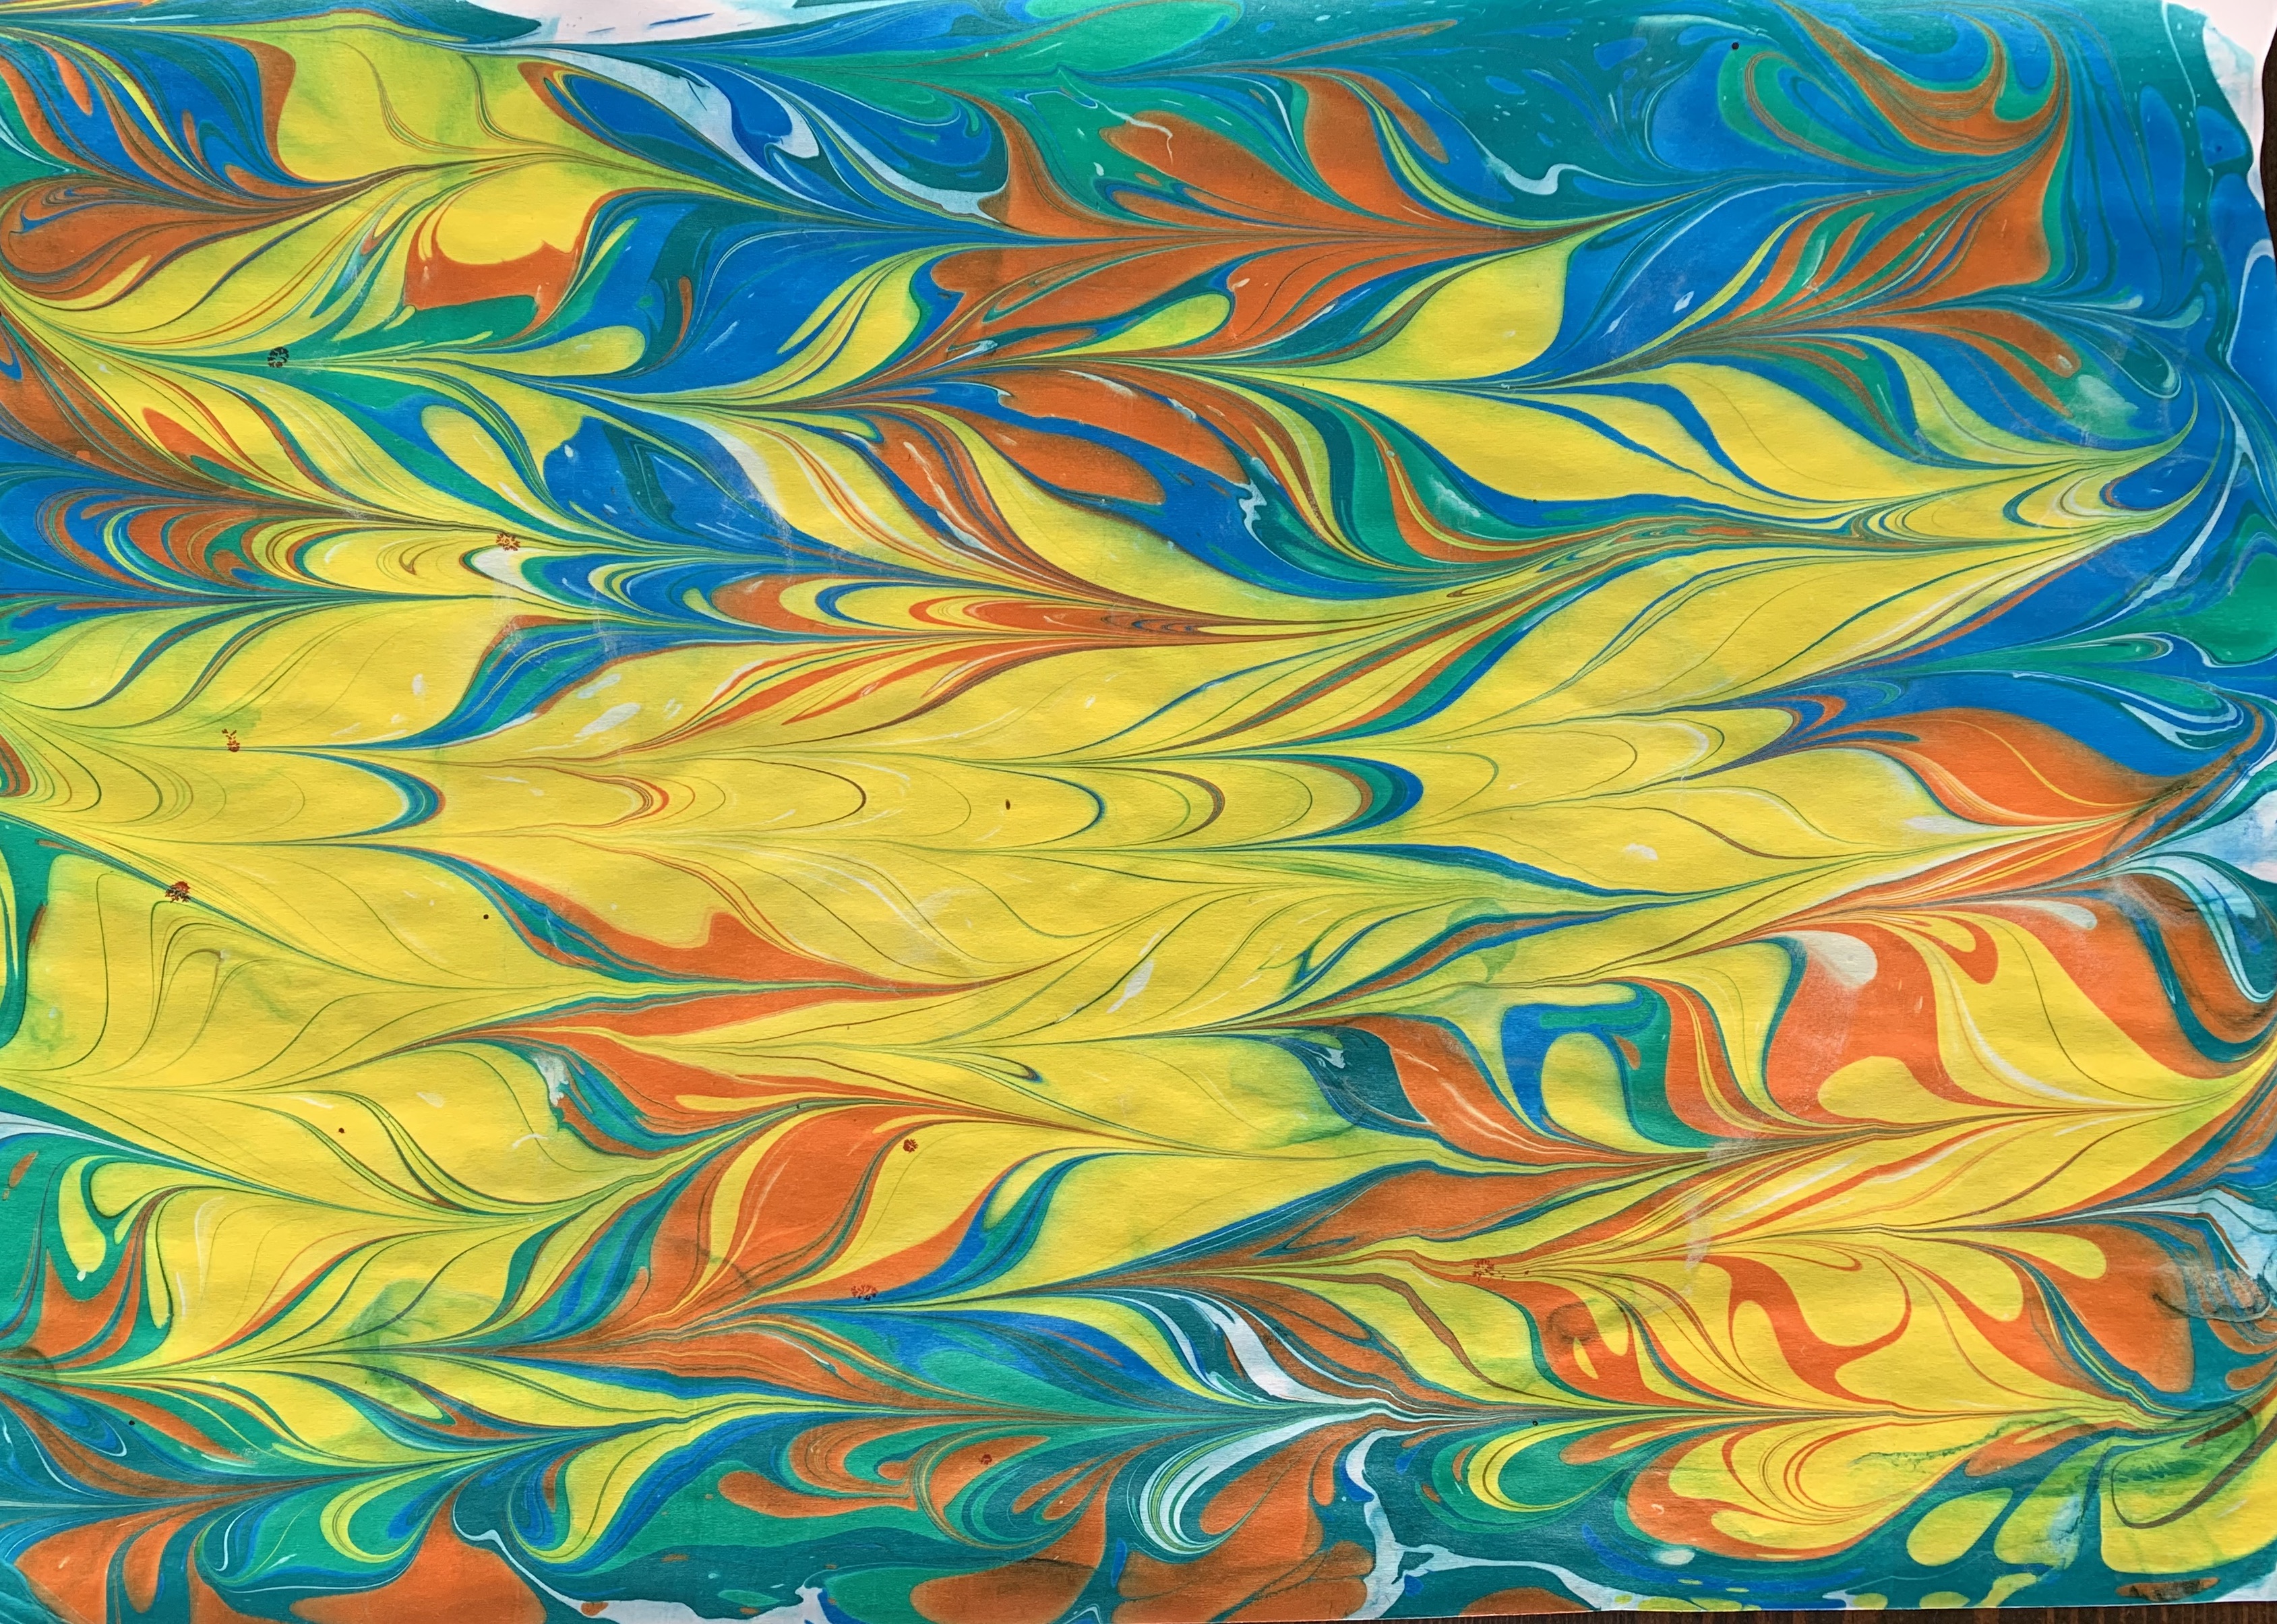
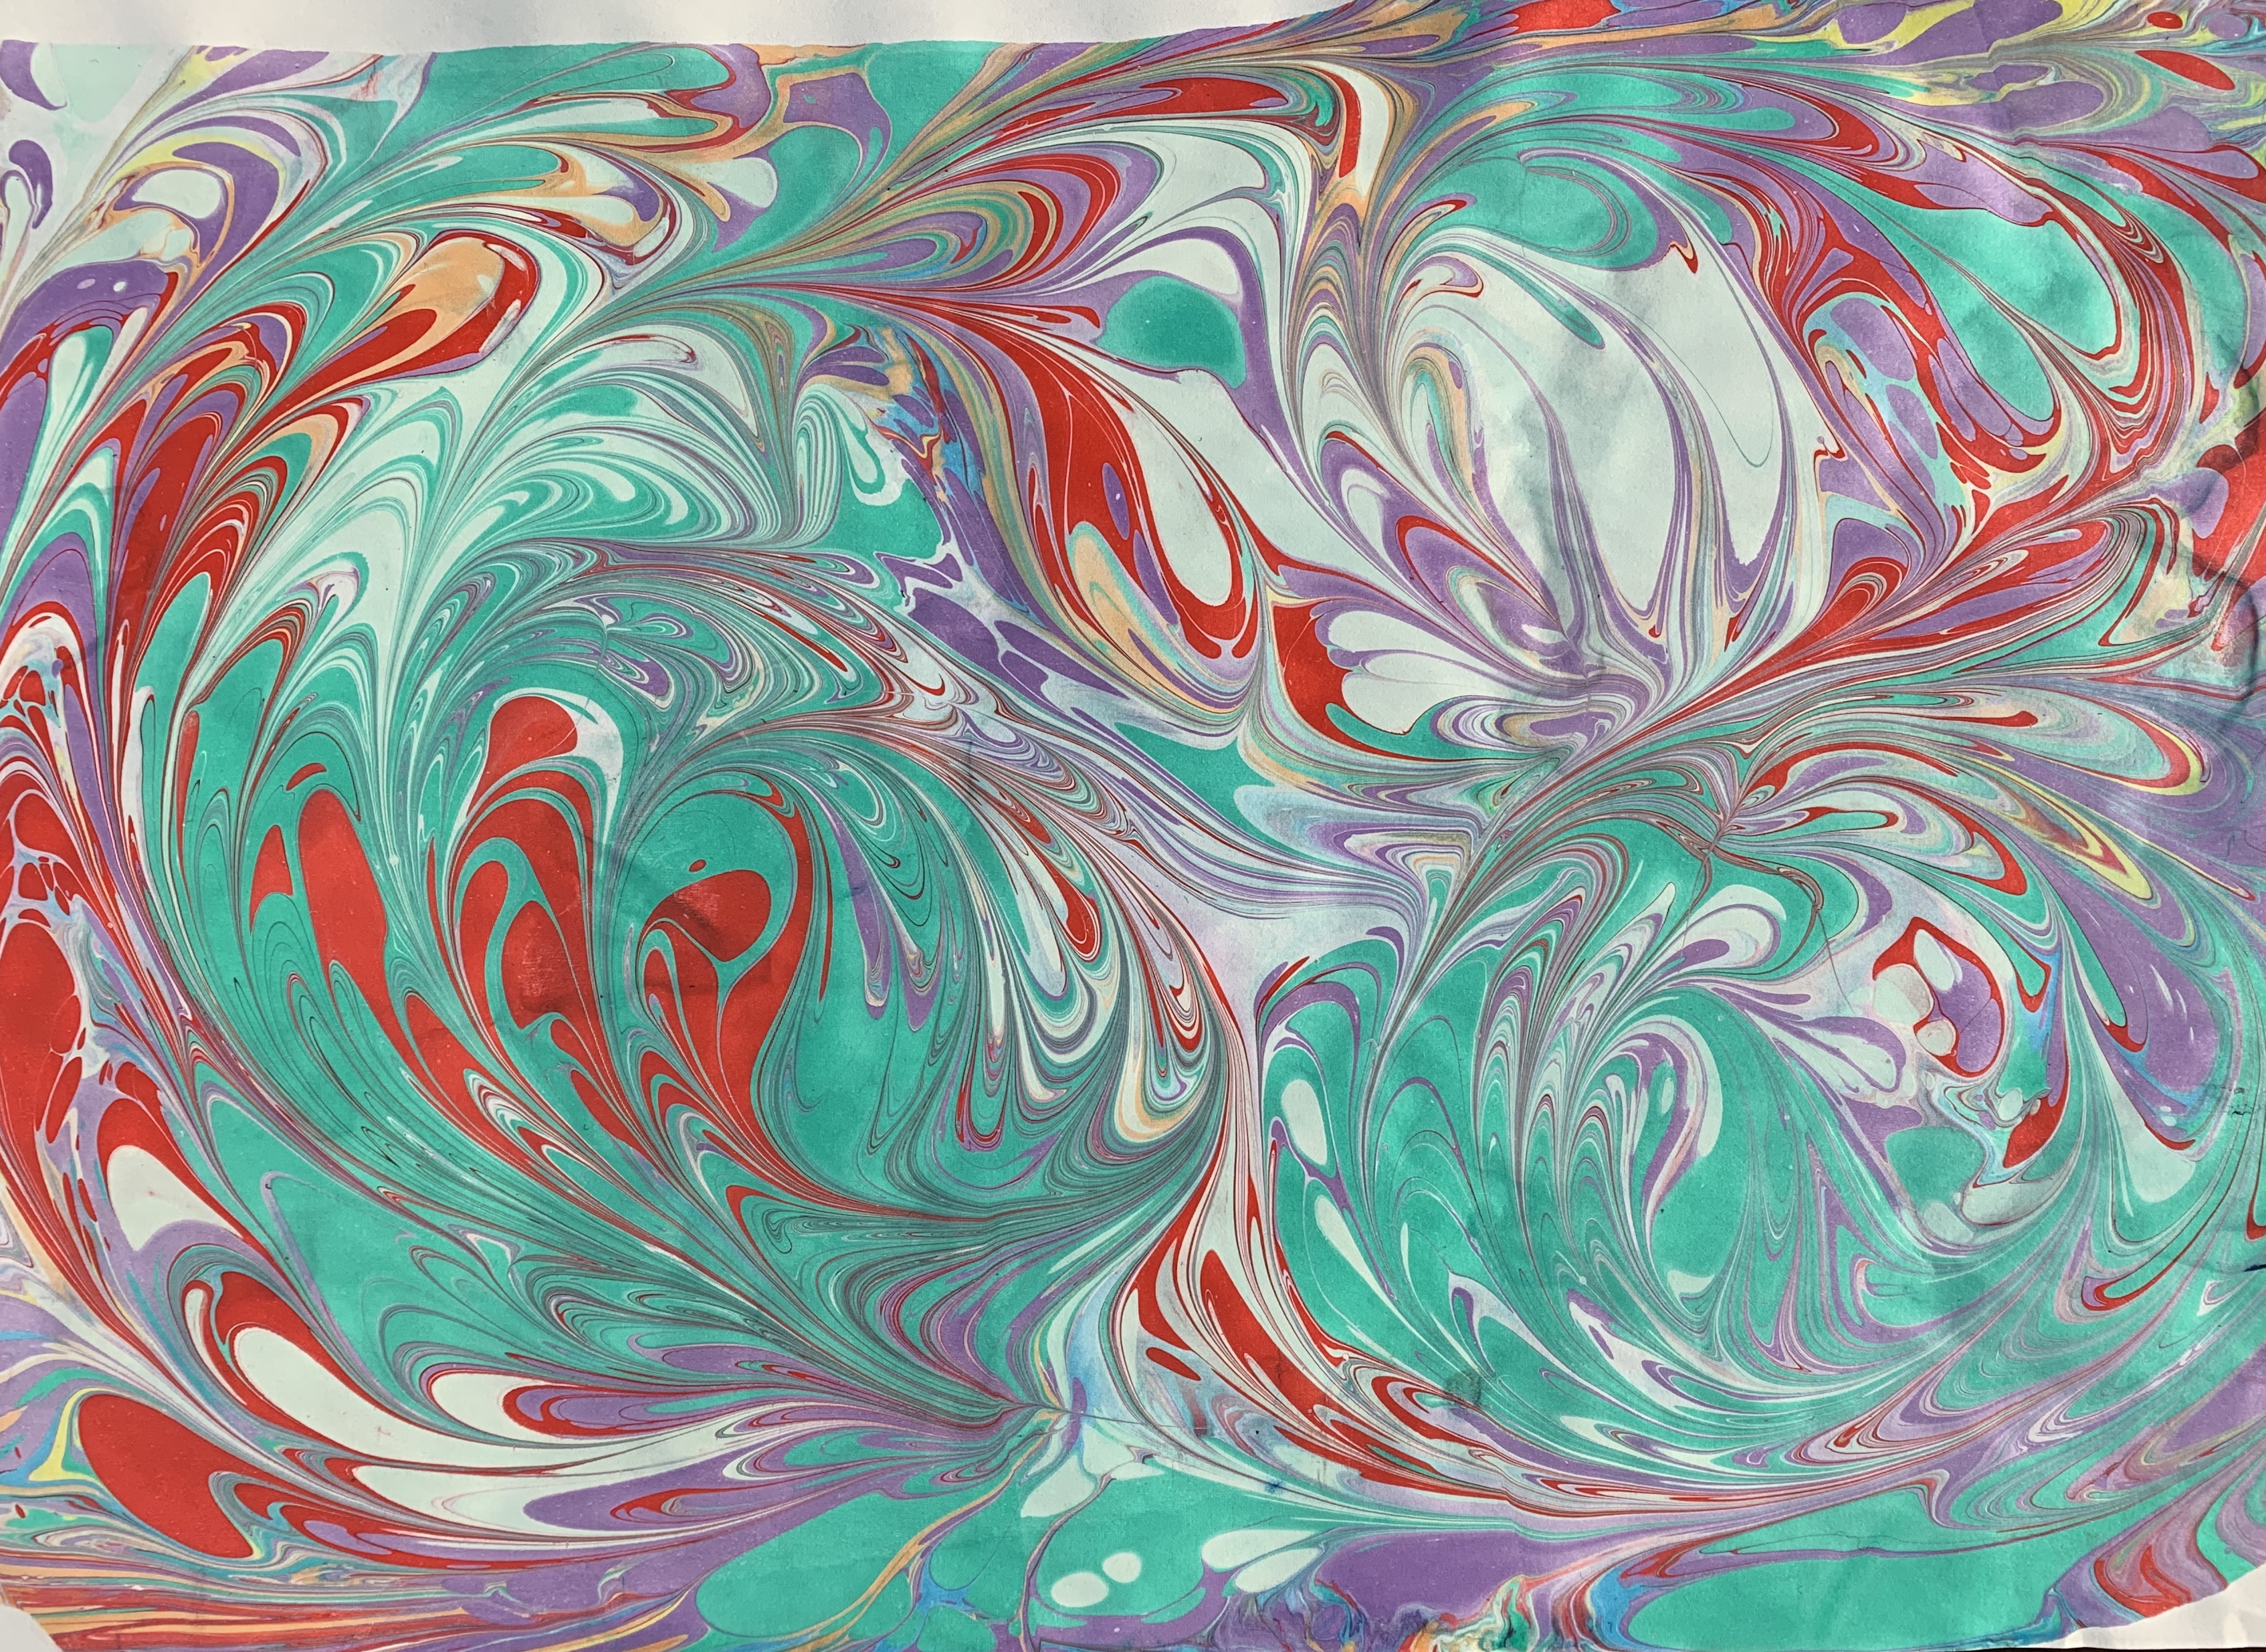
everyone took a turn creating and it was great to see all the different possibilities of color combinations and some of the designs that we came up with were absolutely stunning!
here are some of our ebru creations:

this ebru work also reminded us of another; super fun, way to do ebru- with SHAVING CREAM! i highly recommend doing this outside on a less valuable surface because, let’s be honest, it is a good way to make a big mess… but it is so much fun, and the results are actually really pretty. shaving cream ebru is a fantastic way to introduce the art to smaller children. this is also a perfect process art project for toddlers- they get to get messy with paints and explore colors and patterns galore!
there is really no right or wrong way to do this; gather your materials and just start creating… check out alegra’s video below for some inspiration 🙂
materials-
- large sheets of white paper
- liquid paints
- shaving cream (make sure it is the foam kind, not the gel)
- brushes of varying size and thickness

instructions-
- squeeze and spread shaving cream all over your paper (use your hands!!)
- add drips of paint as desired
- use your fingers or brushes to create designs in the shaving cream
- allow to dry fully before moving
- shaving cream has a tendency to fall off the paper once it is dry so saving these projects can be a bit tricky- be sure to take a photo!
**for those of you that would like to try it, the ebru set we have at home is for sale here**
